
SQL Workbench/J is a free, DBMS-independent, cross-platform SQL query tool. While there are a number of systems supported by SQL Workbench, this guide will focus on connecting to your Amazon Redshift instance.
Typical Challenges

It is recommended that you use the JDBC drivers provided by Amazon for Redshift. If you attempt to use PostgreSQL JDBC drivers, support may be unpredictable. By sticking with the Amazon provided drivers, you will avoid inconsistent behavior that may result from using non-Amazon PostgreSQL drivers.
Also, if Redshift forces SSL connections, this can be a roadblock. The connection parameters need to be explicitly set for SSL. Without setting SSL, the connection will fail.
Step-by-Step Guide
Our guide will walk you through the process of setting up an Amazon Redshift JDBC driver and an SSL connection.
Step 1: Install SQL Workbench
If you don’t already have SQL Workbench installed, visit the SQL Workbench website (http://www.sql-workbench.net/), download the appropriate version for your operating system (http://www.sql-workbench.net/downloads.html) and follow the installation instructions including installation of the Java prerequisite if necessary (http://www.sql-workbench.net/manual/install.html).
Step 2: Download Driver
Download the latest Amazon Redshift JDBC compatible driver. This can be found here: http://docs.aws.amazon.com/redshift/latest/mgmt/configure-jdbc-connection.html
There are a few driver options, so you made need to experiment with a version that works for your setup. Start with the latest release and go back from there.
Step 3: Launch SQL Workbench
Open SQL Workbench and click ‘File’ from the toolbar and select ‘Connect window’ from the drop down menu:

Create a new connection
Step 4: Create Connection Profile
Click the leftmost icon in the toolbar to ‘Create a new connection profile’
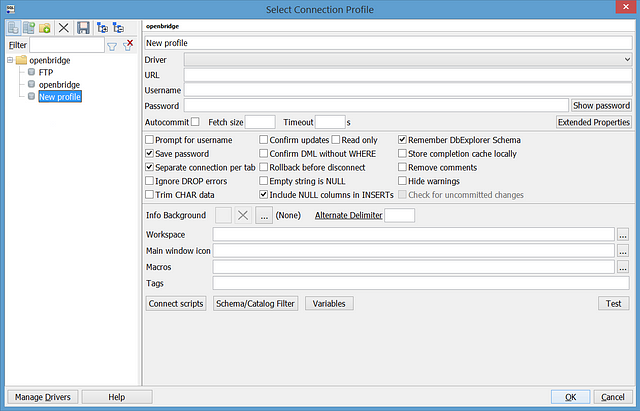
Create a new connection profile
Give the connection a name:
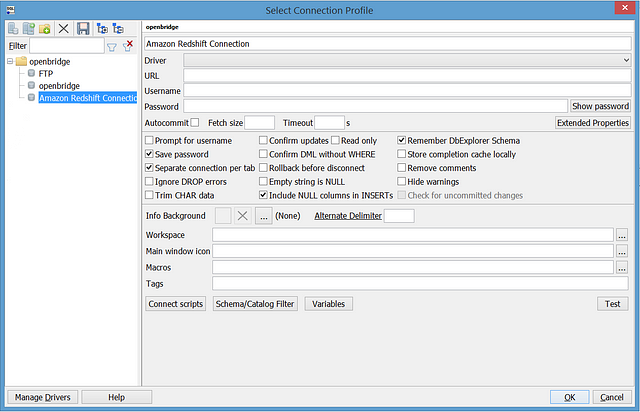
Name a connection
Step 5: Select Redshift Drivers
Click the ‘Manage Drivers’ button in the lower left corner. Enter a name for the driver in the Name box and select ‘Amazon Redshift JDBC Driver’ from the list of drivers on the left.
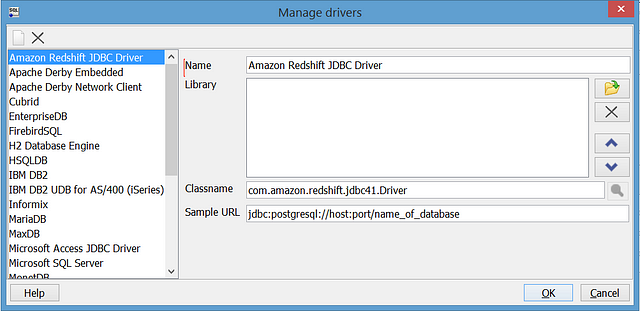
Select a driver
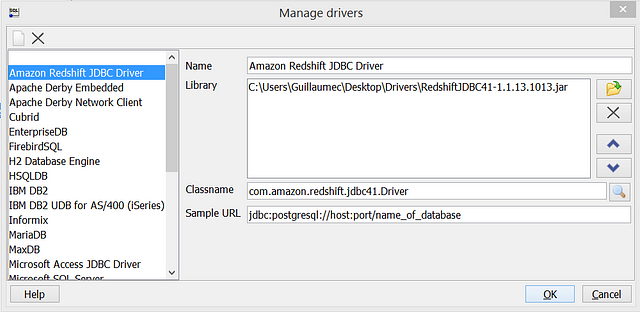
Click the folder icon to the right of the Library box, navigate to the driver you downloaded in step 2 and click ‘Open’ then ‘OK’ on the next screen.
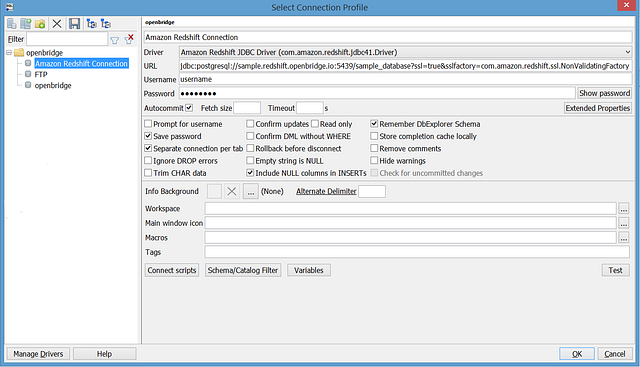
Step 6: Configure Database Connection Details
Replace ‘host’, ‘port’ and ‘name_of_database’ in the sample URL string provided with the host name, port and database name from the connection details provided by Openbridge when you created your Amazon Redshift instance.
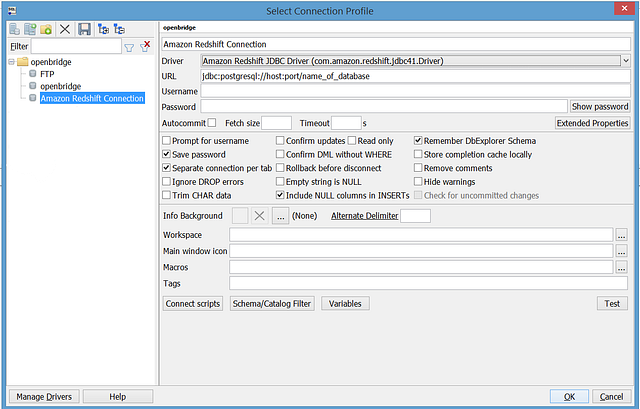
At the end of the resulting URL string you will need to paste the following string to enable connection via SSL:
?ssl=true&sslfactory=com.amazon.redshift.ssl.NonValidatingFactory
The resulting full URL string will look similar to this:
jdbc:postgresql://sample.redshift.openbridge.io:5439/sample_database?ssl=true&sslfactory=com.amazon.redshift.ssl.NonValidatingFactory
Enter the ‘Username’ and ‘Password’ values that you were provided in the connection details from Openbridge, check the ‘Autocommit’ box and click ‘OK’.
The ‘Autocommit’ selection was suggested by Amazon. However, some users have reported success without the ‘Autocommit’ selection while others have reported connection difficulties leaving ‘Autocommit’ unchecked. Per Amazon, the safest choice is to leave ‘Autocommit’ checked.
If you receive an error message, check your syntax in the URL string. Otherwise, you should now be connected and can run a query in one of the ‘Statement’ tabs or review the list of available tables in the ‘Database Explorer’ tab.
Step 7: Sample Test To Validate Connection
You can test your connection by running the following query in one of the ‘Statement’ tabs
select * from information_schema.tables;
If your connection is successful, you will see a list of tables in your database in the ‘Results’ tab

If you have any issues connecting to your Redshift instance after following these instructions, please contact Openbridge Support (support@openbridge.com).