
Sometimes you just want the SQL used under the hood in Tableau! Maybe you want to use the SQL with SQL Workbench or a different query tool. However, Tableau does not make it easy to see what is happening under the hood.
Exporting SQL From Your Workbook
Let’s say you have created a data visualization in Tableau like the simple example below.

Simple data viz in Tableau
You would like to be able to run the SQL statement used to generate this visualization in a different query tool. Seems like that should be simple enough, right? Well, it turns out to be a little more complicated than you would think.
Let’s Get Started: Step-By-Step Guide
We created this step-by-step guide to save you time and finally get a peek under the Tableau covers. Note: This guide covers Tableau v9.x, there might be slight variations for new versions!
Step 1: Pick Your Visualization
Once you have the desired visualization created in Tableau, the first step is to select Help → Settings and Performance → Start Performance Recordingfrom the Tableau toolbar.

Select Performance Recording
Step 2: Refresh Your Data
Then right click on the source in the Data toolbar and select ‘Refresh’. This will force Tableau to re-run the query.
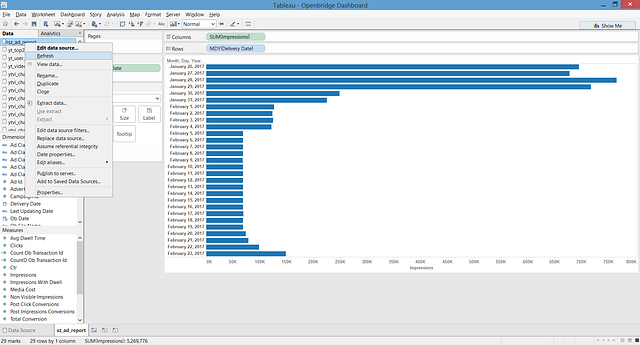
Select Refresh to re-run the query
Step 3: Stop Performance Recording
Once the query completes, select Help → Settings and Performance → Stop Performance Recording from the Tableau toolbar.

Stop Performance Recording
This should result in a new Tableau window opening with a workbook called ‘Tableau — PerformanceRecording’
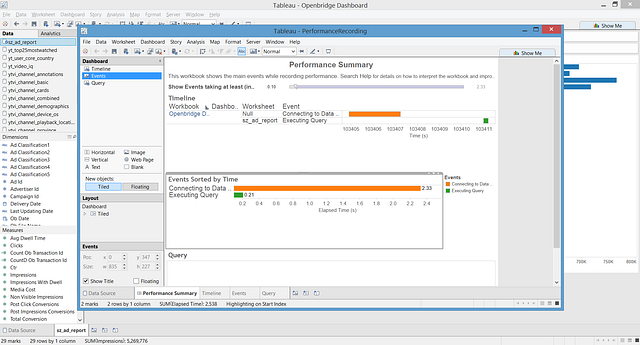
Performance Recording Summary
Step 4: View Your Data
Right click anywhere in the bar next to ‘Executing Query’ and select ‘View data’
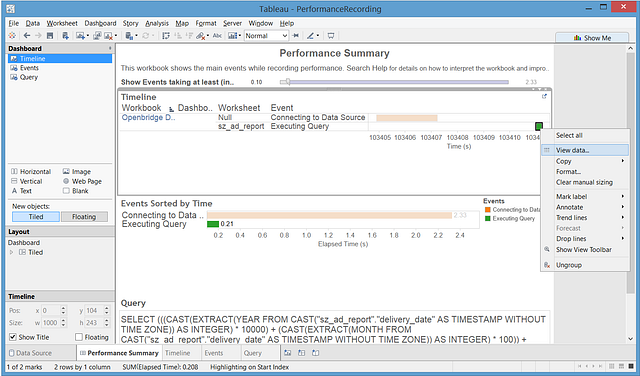
Select ‘View data…’
Step 5: Grab The SQL Query
If you click the ‘Underlying’ (Tableau v9.x) or ‘Full Data’ (Tableau v10.x) tab in the resulting pop-up window, you will see the SQL for the query in the ‘Command’ field.
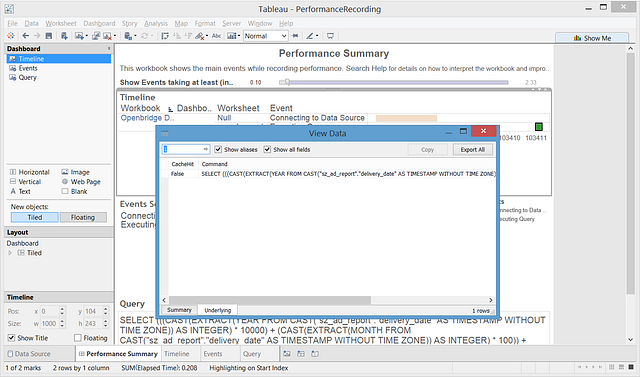
Query View
You can highlight the text in that field, select ‘Copy’ and either paste it directly into the SQL tool of your choice or into a text file for the time being.

Copy query
In our example, the SQL statement looks like this…
SELECT (((CAST(EXTRACT(YEAR FROM CAST(“sz_ad_report”.”delivery_date” AS TIMESTAMP WITHOUT TIME ZONE)) AS INTEGER) * 10000) + (CAST(EXTRACT(MONTH FROM CAST(“sz_ad_report”.”delivery_date” AS TIMESTAMP WITHOUT TIME ZONE)) AS INTEGER) * 100)) + CAST(EXTRACT(DAY FROM CAST(“sz_ad_report”.”delivery_date” AS TIMESTAMP WITHOUT TIME ZONE)) AS INTEGER)) AS “md_delivery_date_ok”,
SUM(“sz_ad_report”.”impressions”) AS “sum_impressions_ok”
FROM “public”.”sz_ad_report” “sz_ad_report”
WHERE ((“sz_ad_report”.”delivery_date” >= (TIMESTAMP ‘2017–01–26 00:00:00.000’)) AND (“sz_ad_report”.”delivery_date” < (TIMESTAMP ‘2017–02–25 00:00:00.000’)))
GROUP BY 1
Step 6: Test Your SQL Query
You can then connect to a SQL tool like SQL Workbench using the same connection details you used in Tableau, paste the SQL statement into the ‘Statement’ tab and click the ‘Execute’ button.
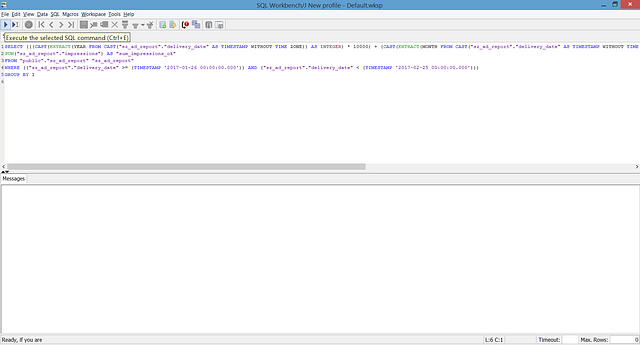
Test query
Step 7: Celebrate!
Voila! You should now see the all the data used for the Tableau visualization in the ‘Results’ tab.
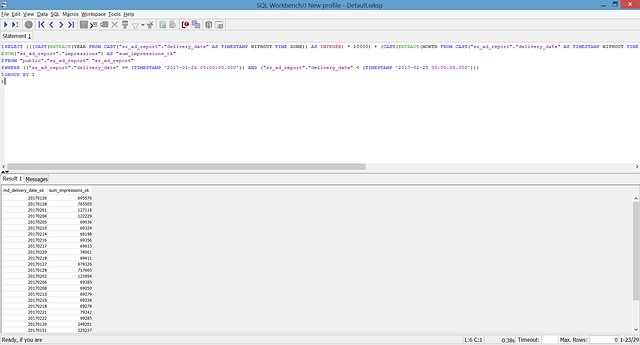
Query results
Now you can use this statement in other query tools without the need to recreate one and save time!